|
Lafayette KT-135 EXPLOR-AIR radio kit |
 |
|
|
|
|
|
|
|
|
|
|
|
Welcome to the Lafayette KT-135 pages. If you found this
site because you Googled "KT-135" then you're probably a
fellow fan of this radio, and likely built one as a
teenager. In the
following pages you will find some restored KT-135s, as well
as information, pictures and repair tips.
When properly constructed and used with a decent longwire
antenna, the KT-135 is capable of surprising performance. |
|
|
|
|
|
|
|
|
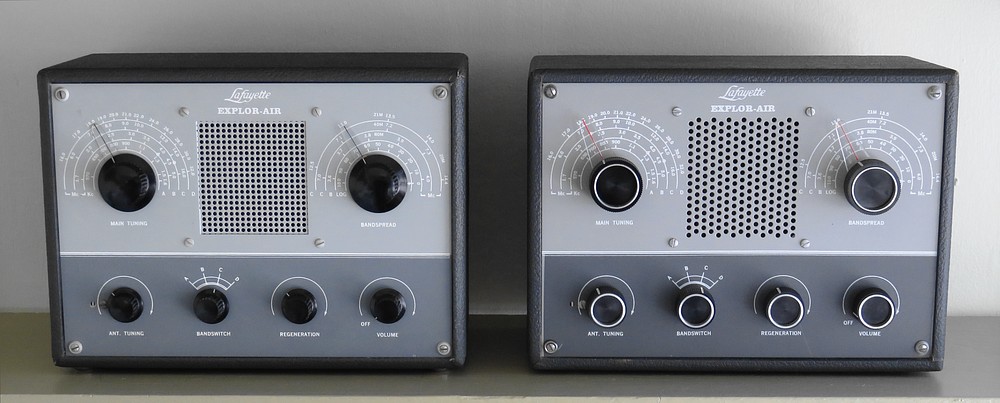
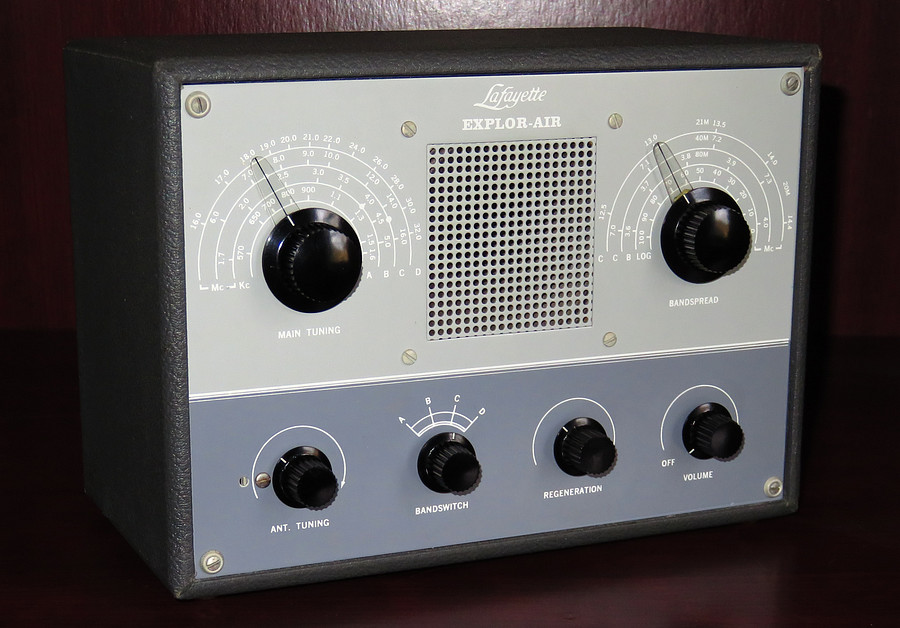
Lafayette
KT-135
EXPLOR-AIR
regenerative radio
(1958-
1965) |
|
|
|
|
|
|
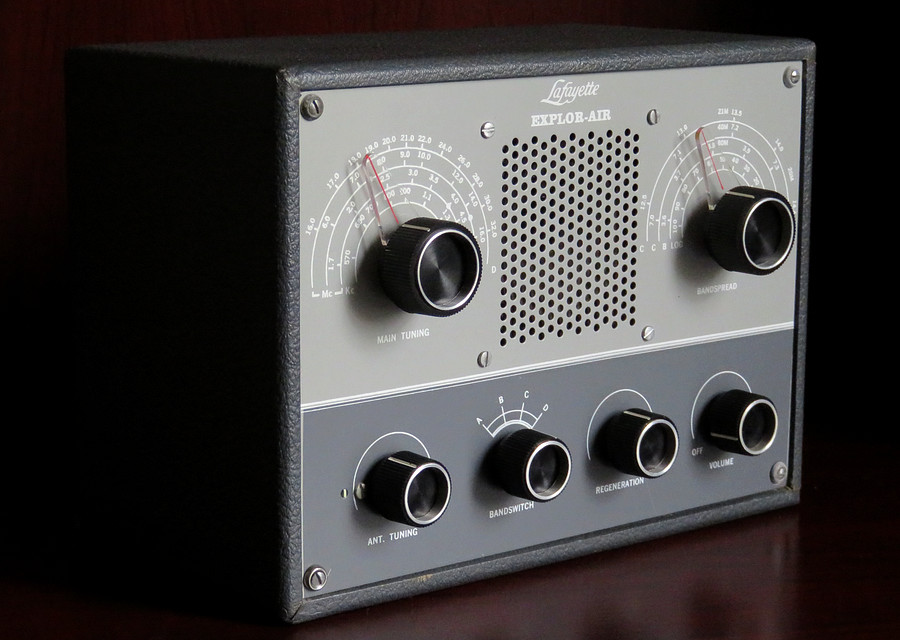
Lafayette
KT-135
EXPLOR-AIR
regenerative radio
(1965
- 1971) |
|
|
|
|
|
|
|
|
|
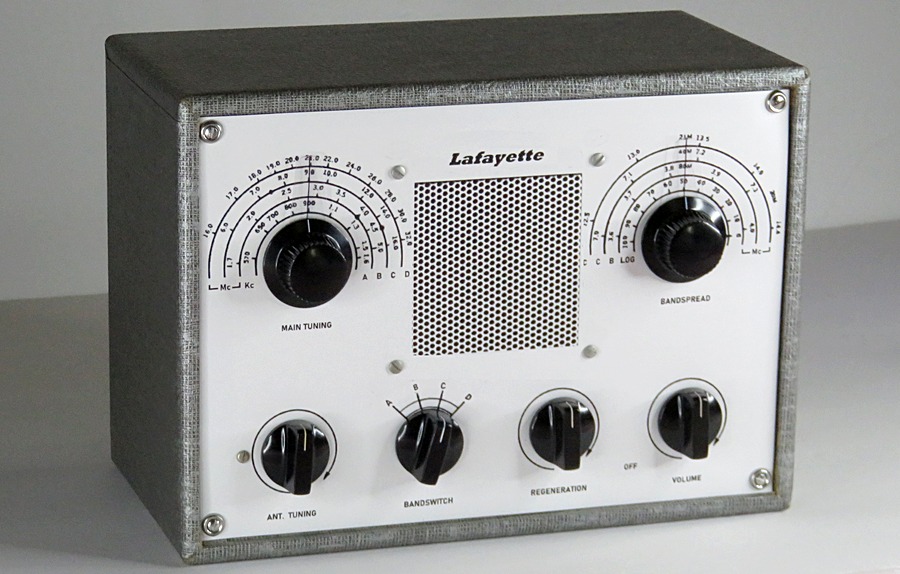
Lafayette
KT-135 1958 prototype
recreation (See page 4) |
|
|
|
|
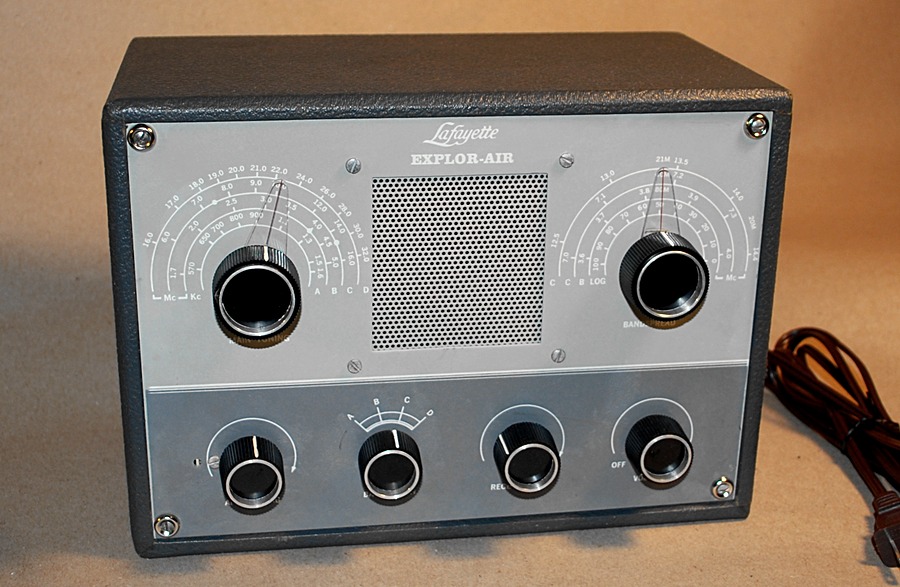
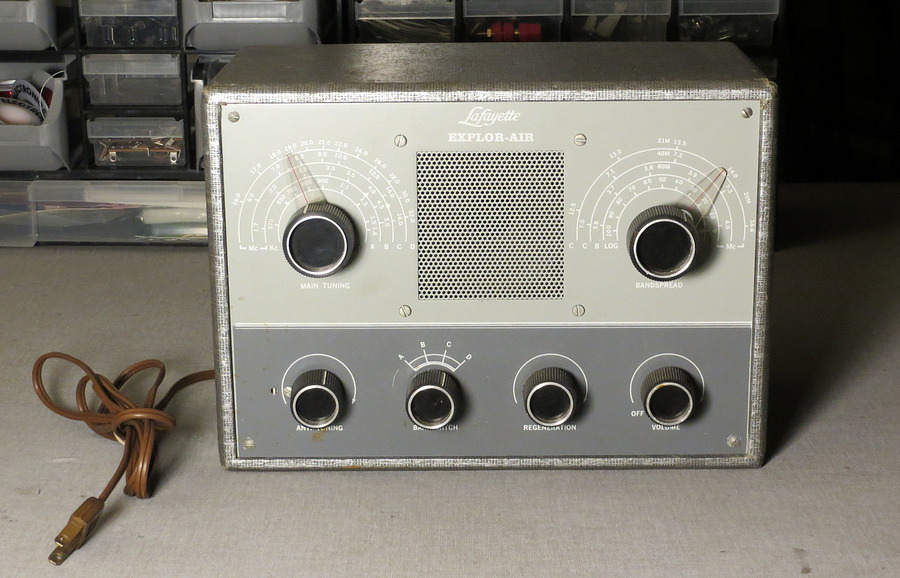
1968 Lafayette KT-135 EXPLOR-AIR found on ebay
in 2015 |
|
|
|
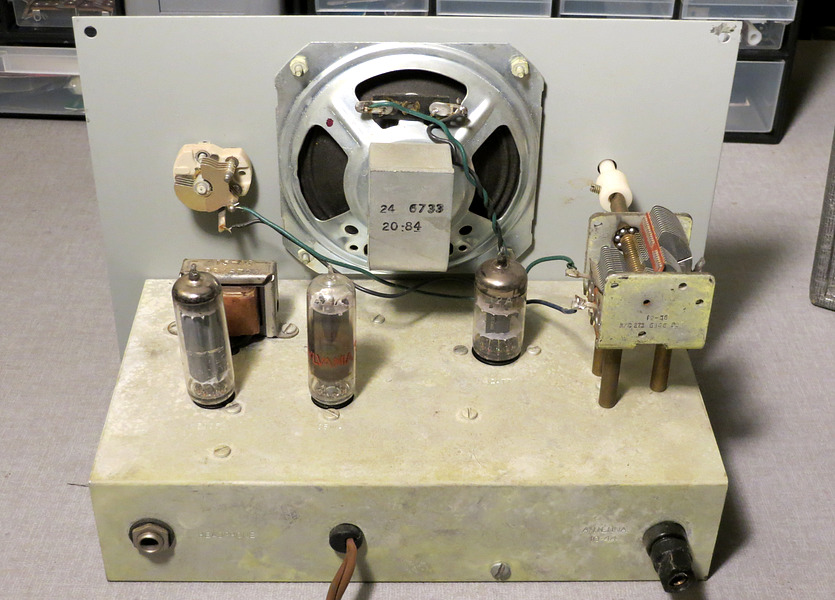
The radio directly above was originally
built around 1968 by persons unknown. It was purchased on
ebay in February of 2015, but it wasn't sold by the original
owner, and there is no history on it.
Lafayette sold the KT-135 Explor-Air kit from 1958 to 1971.
In 1972 the Lafayette catalog didn't carry a KT-135, but
interestingly you could purchase the much older Philmore
Model 7001C three tube, two band kit.
The copyright to Lafayette for "Explor-Air 4 band
receiver kit" was granted on January 6, 1961. Originally
sold in 1958 for $18.50, in 1963 it went up to $21.95. In
1964 the price rose to $22.95 and remained there till 1971.
According to Peter A. Markavage, who worked for Lafayette,
the cost of the kit for Lafayette was about $9.00.
This 1968 version was purchased in 2015 for $90.91 which was
a good deal. $90.91 was only worth $13.35 in 1968! |
|
|
|
|
|
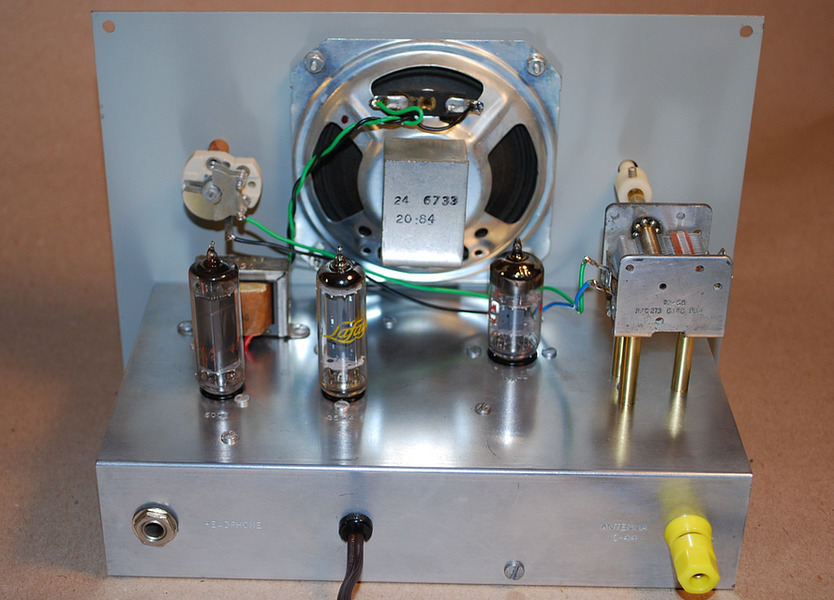
This is how it looked after it was restored.
|
|
|
|
|
|
|
|
|
|
|
|
Click for full size photo. |
|
|
|
|
|
|
| |
| |
|
|
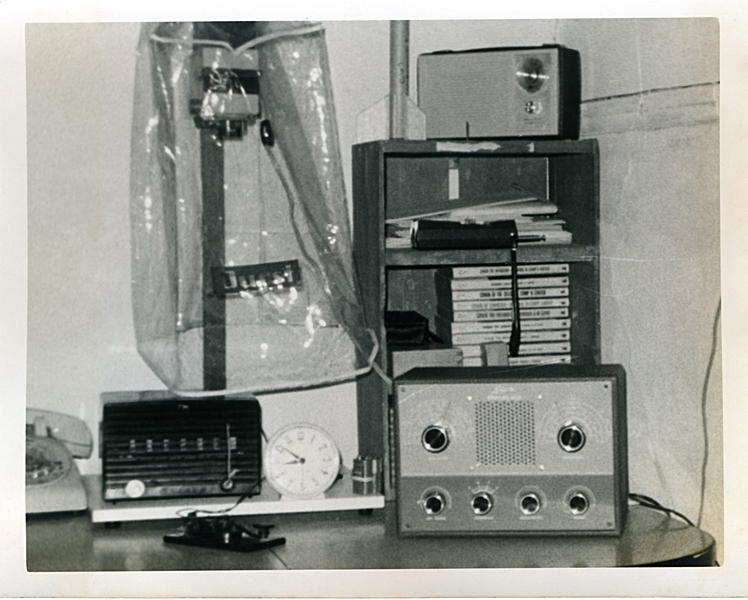
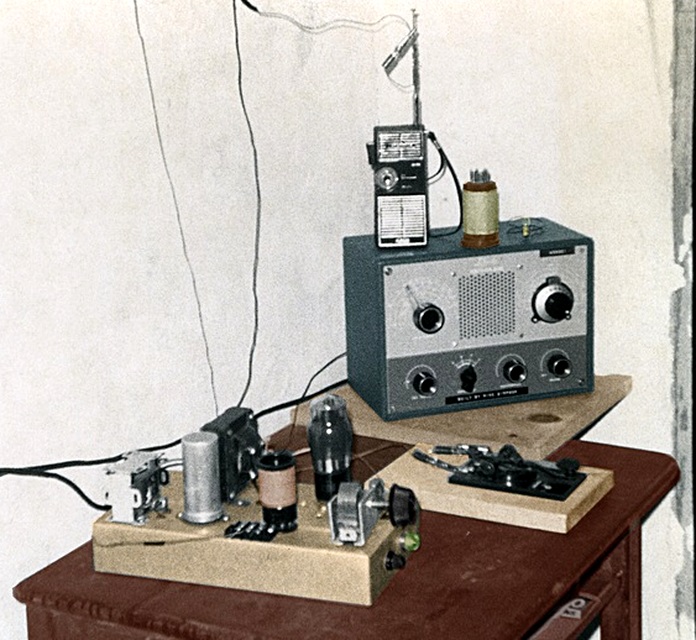
Above is yours truly in my "ham
shack" in 1971. To the left of the KT-135 is a 40
meter transmitter. It was built into a wooden box
that my dad's "English Leather" aftershave came in.
Believe it or not, I actually made a few contacts
with this setup. My first contact was made on April
28, 1971 with Emil B. Walker, WN8GBT in Columbus,
Ohio.
The "ham shack" was a storage room in the basement
that my parents let me use. On the outer door was a
clasp that had a clothespin in it, but I put a
padlock in its place so my brother Rob wouldn't mess
with my stuff. This attempt to keep my brother out
actually made him break in to see what was in there.
I would have been better off with the clothespin.
I had a novice class license. My call letters were
WN3QQE, which I hated. When I sent my call sign, the
end of it sounded like "Dah-Dah-Dit-Dah,
Dah-Dah-Dit-Dah, DIT". I didn't like that DIT
at the end because it sounded so dumb. I wondered
why I had been cursed with this by the FCC. C'mon
man,
FUNK DAT!
Notice the little desk I'm
using. That was once in my bedroom, and it came from
my Uncle Jim via my grandmother. I built my first
crystal radio on that desk in 1966. In 1974 we moved
to a new neighborhood and I lost track of it. |
|
| |
|
|
|
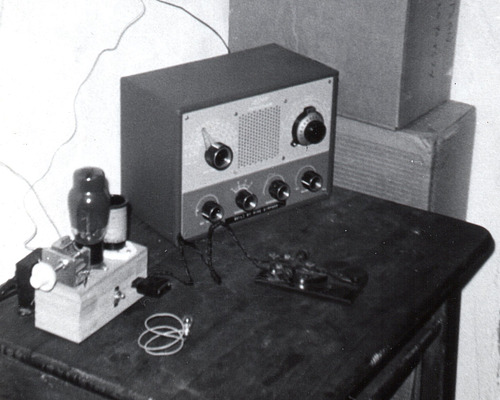
Here is the KT-135 right after I
built it, but before I built the transmitter. On the
left is a key and a code practice oscillator built
into an old radio cabinet. Behind the KT-135 is a
stack of Conan books, the real ones by Robert E.
Howard! Above them on the shelf is my (useless)
Astro Commander walkie-talkie. The plastic
bag-looking thing is the dust cover on my enlarger,
a Durst J35. These pictures were printed with that
enlarger. |
|
| |
|
|
|
|
This colorized photo shows the
second version of the transmitter. It's the same
transmitter, but now it has a choke filtered power
supply. It's not isolated from the AC line, which
was a not good idea considering the floor was
concrete and you could get shocked on the key, but
that's the way we did things back then. A piece of
wood was nailed to the top of the desk to hold the
KT-135. The transmitter chassis was aluminum but had
a bronze colored metal plating. |
|
| |
| |
| |
| |
|
|
Before and After.
|
|
|
| Before and After. |
| |
| |
| |
|
|
| This is how it looked
when I got it in the mail. It was in very good condition
cosmetically and when I turned it on, IT WORKED! Sort of. It
didn't work very well, and the antenna tuning control (on
the bottom-left) gave a horrible static when you adjusted
it. The vinyl clad wooden case is in excellent shape. |
|
| |
| |
| |
|
|
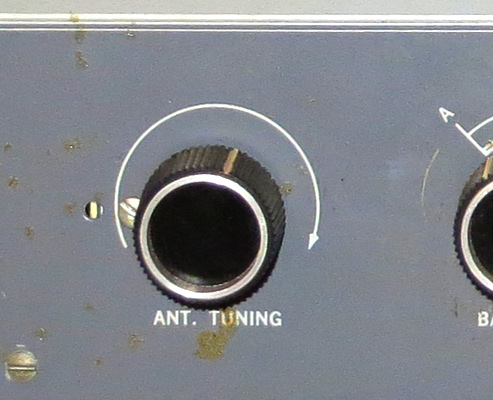
In addition to causing
static, the antenna tuning knob wobbled. There was some kind
of gunk on the front panel that I initially thought was
rust. It came off for the most part with water, but it took
the letter "U" in "ANT. TUNING" with it.
|
|
|
|
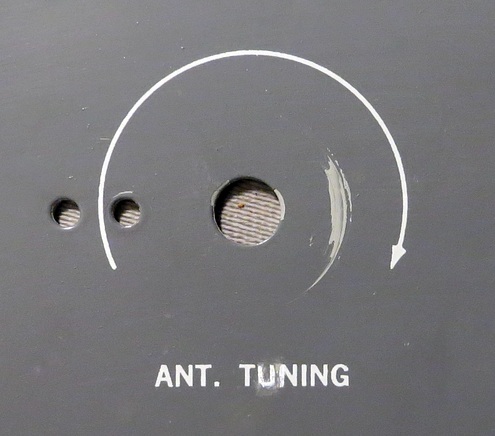
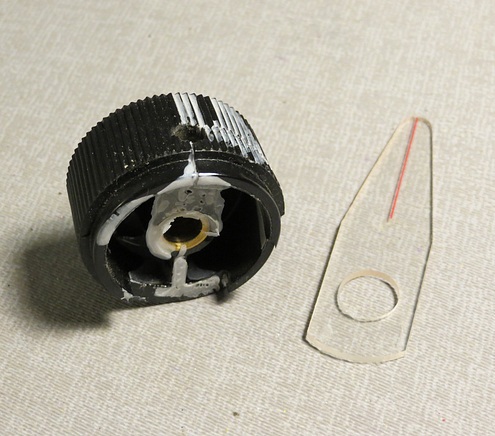
I tried to rebuild the
letter "U." It's not perfect but it's hard to see when
you're using the radio. To the right is a broken and glued
knob. I don't know what kind of glue that was, but I got
most of it off. ALL of the knobs had issues. One was glued
on to the shaft!
|
|
| |
|
|
|
|
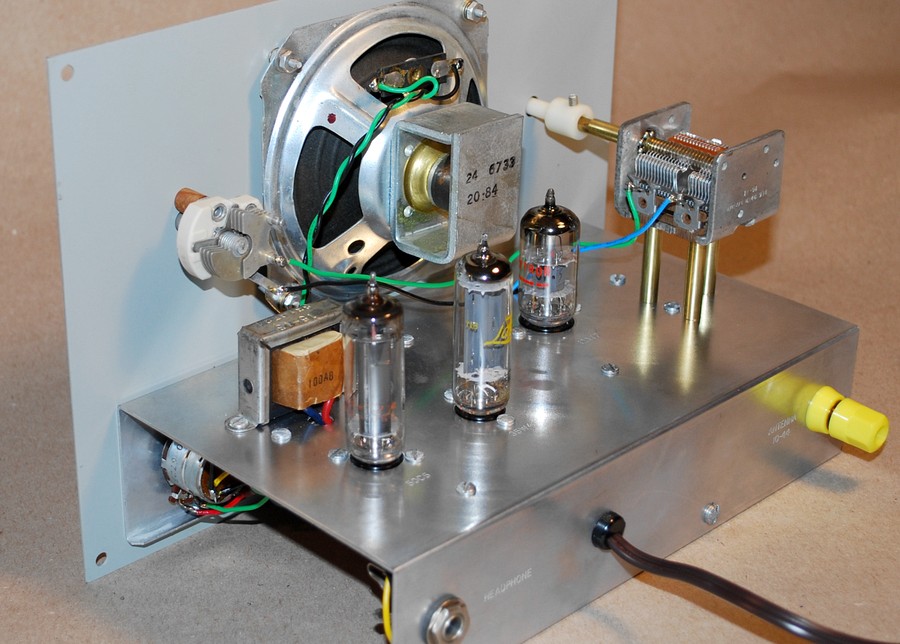
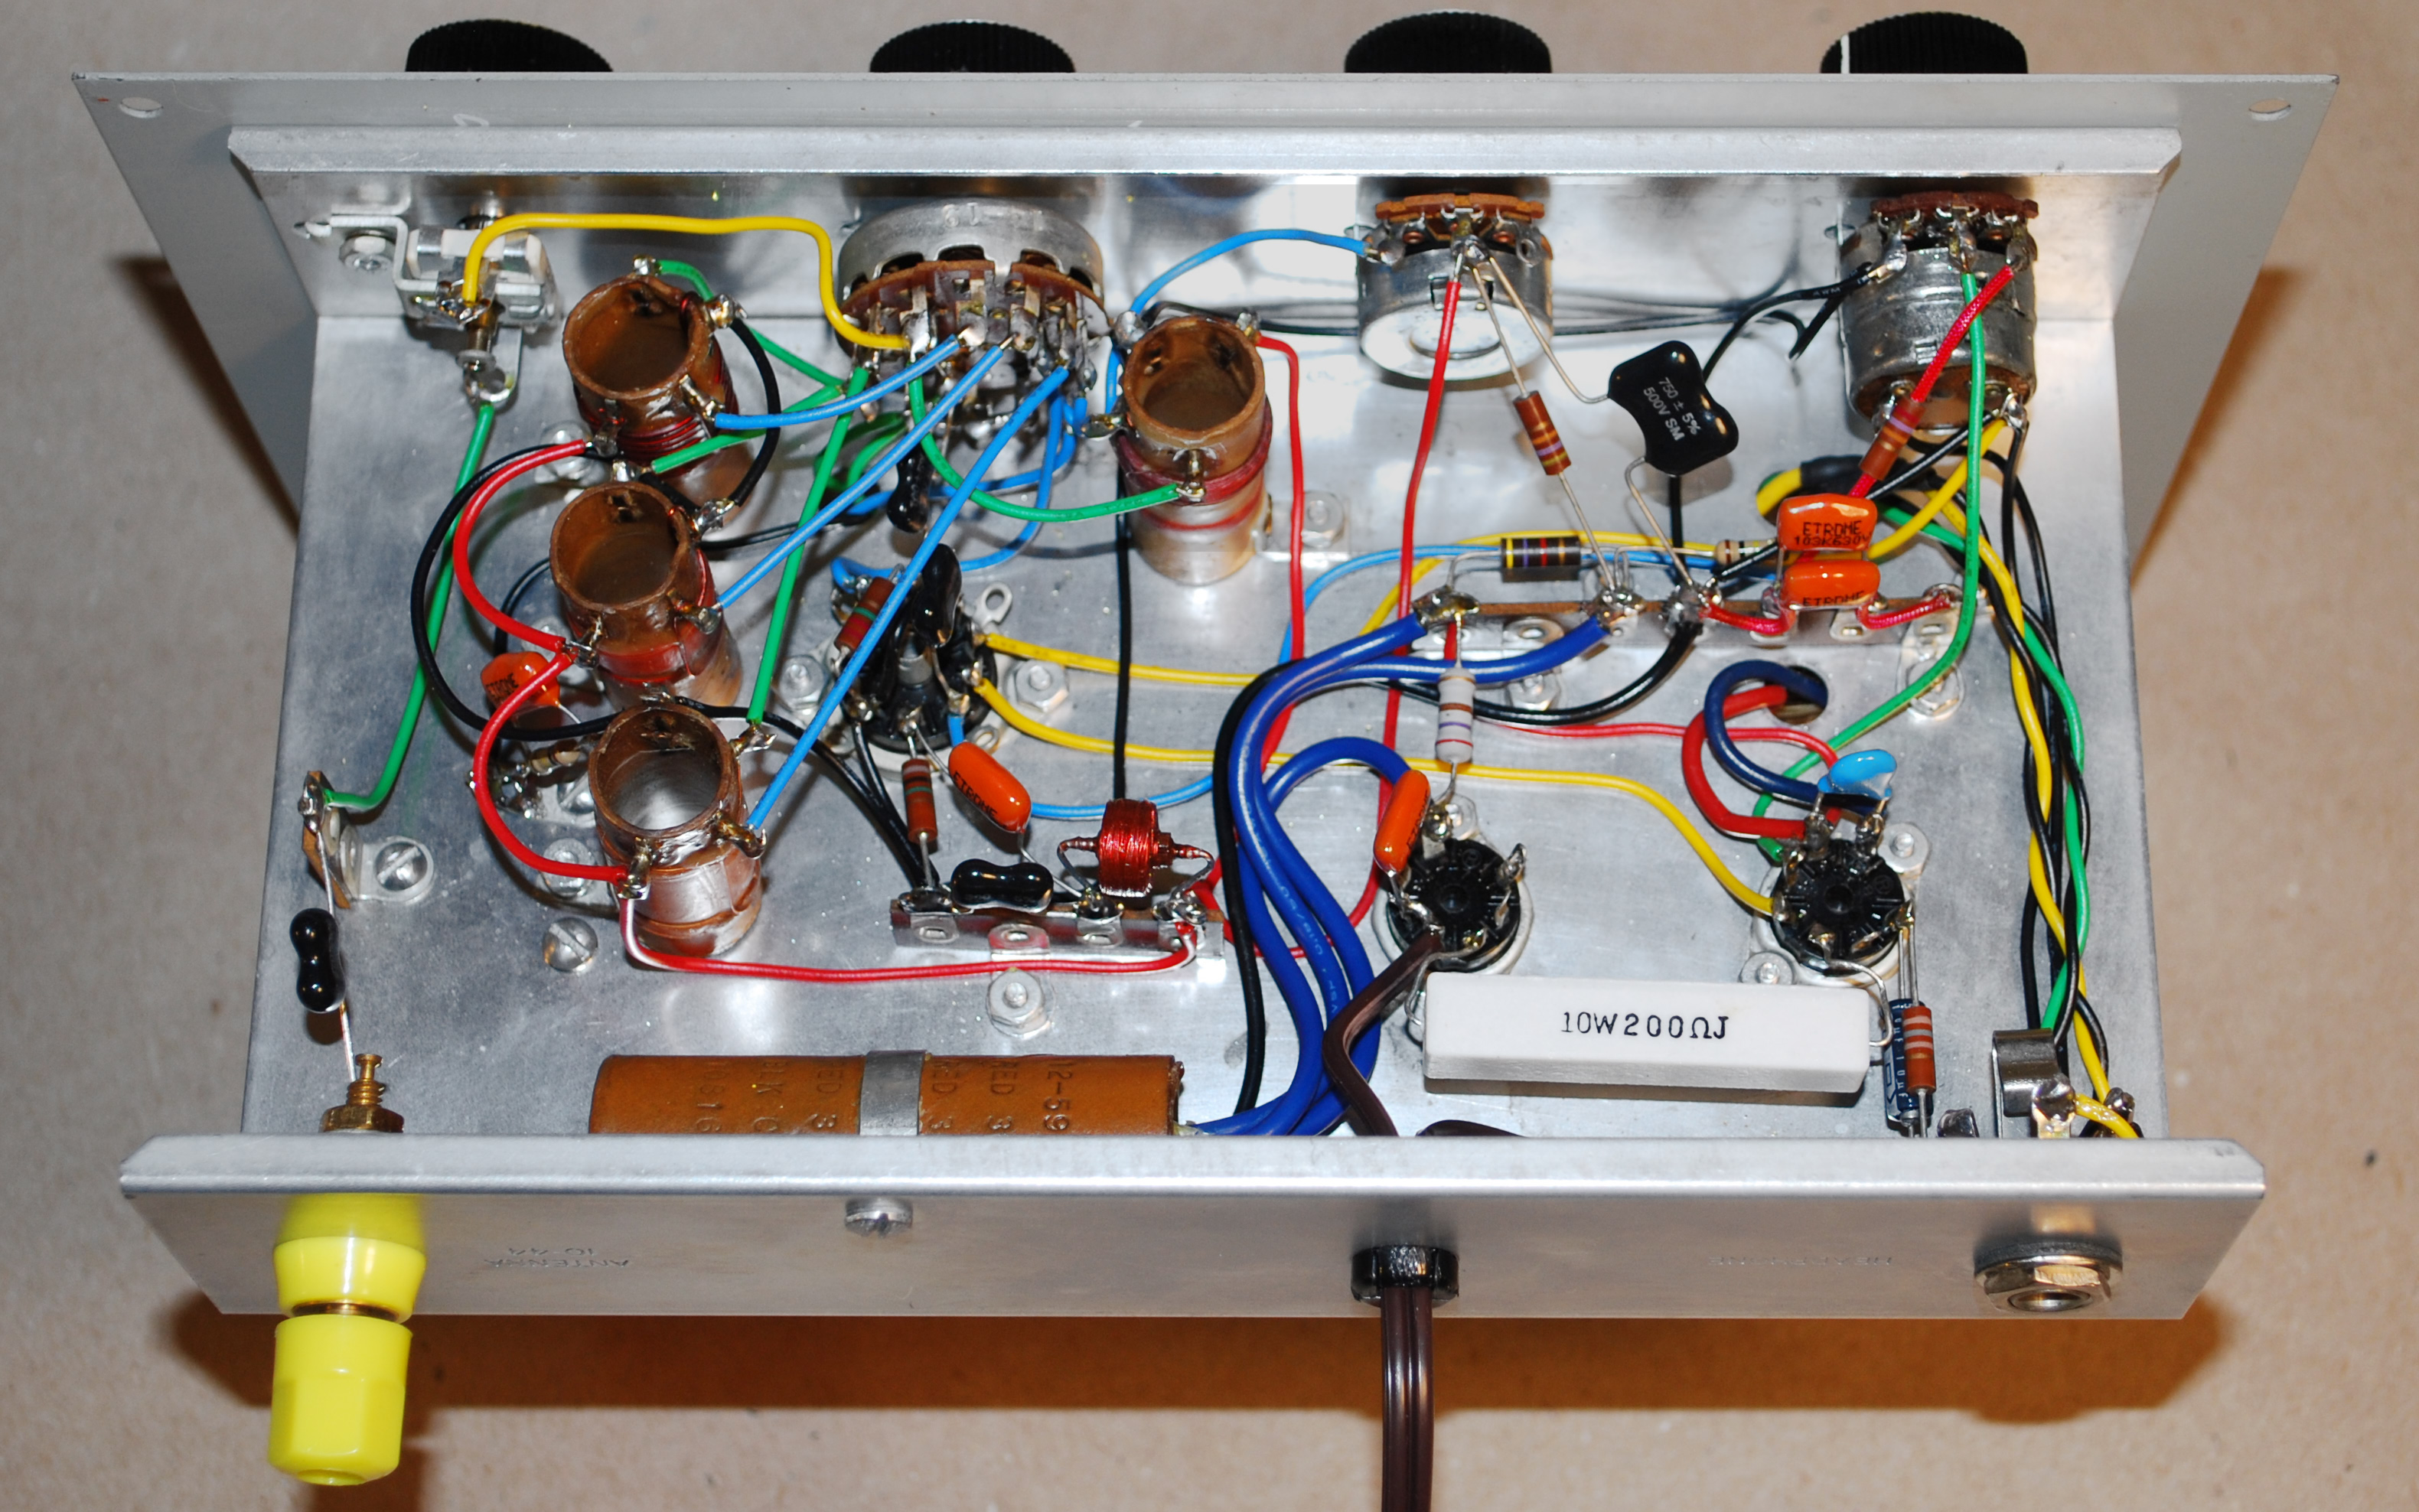
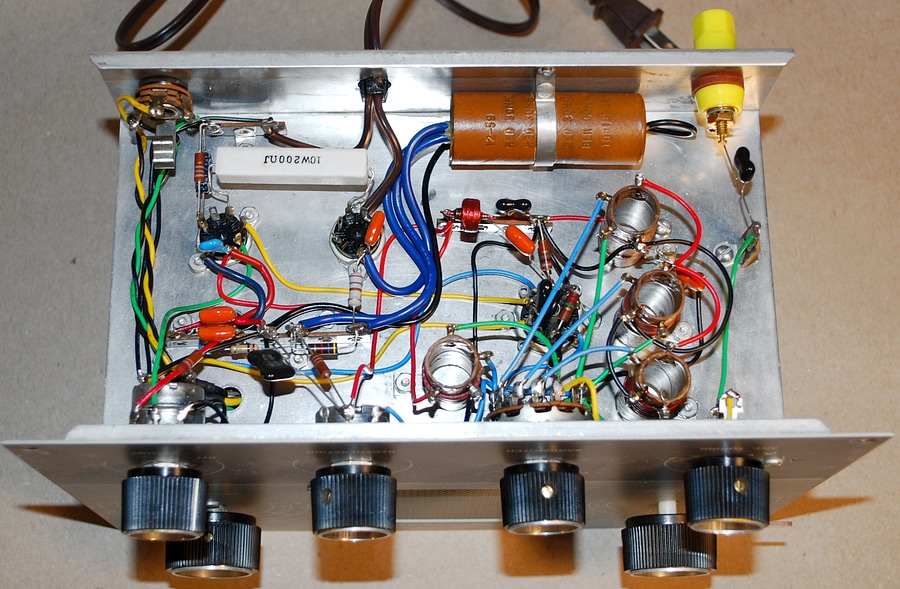
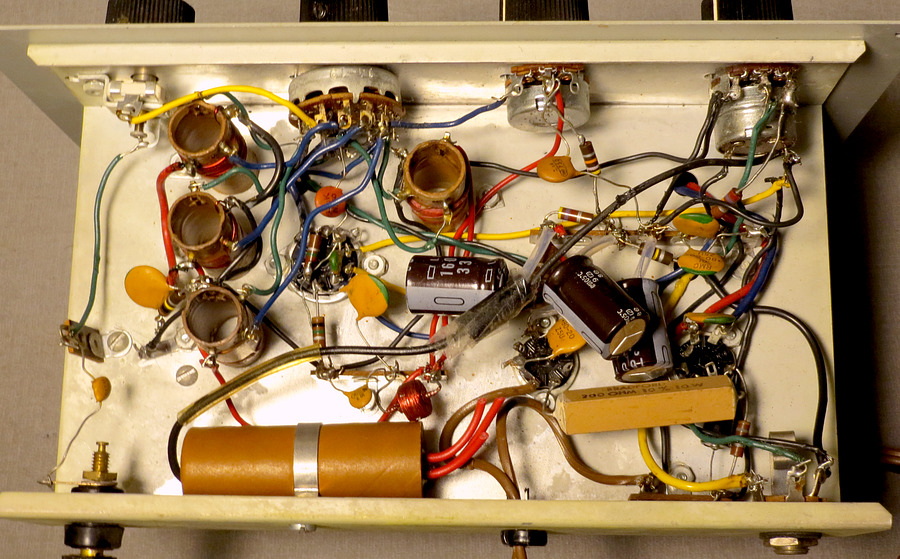
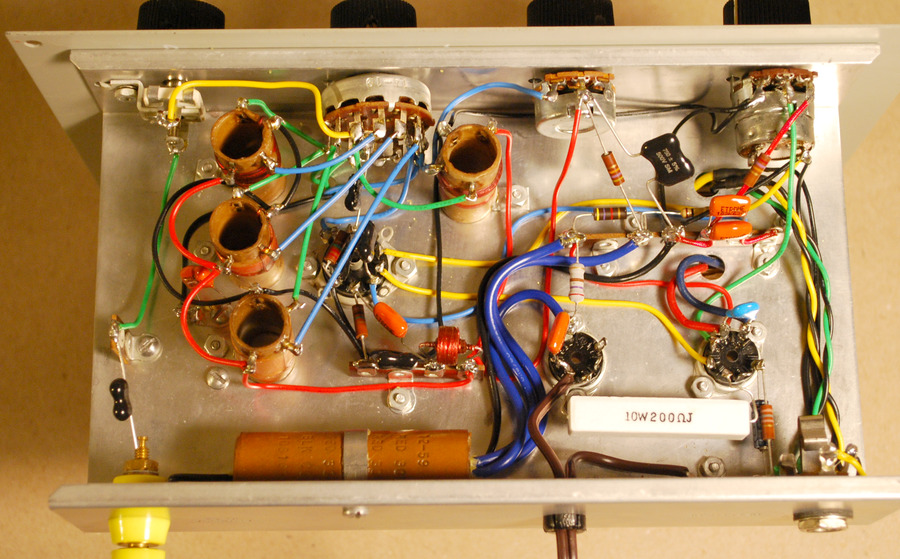
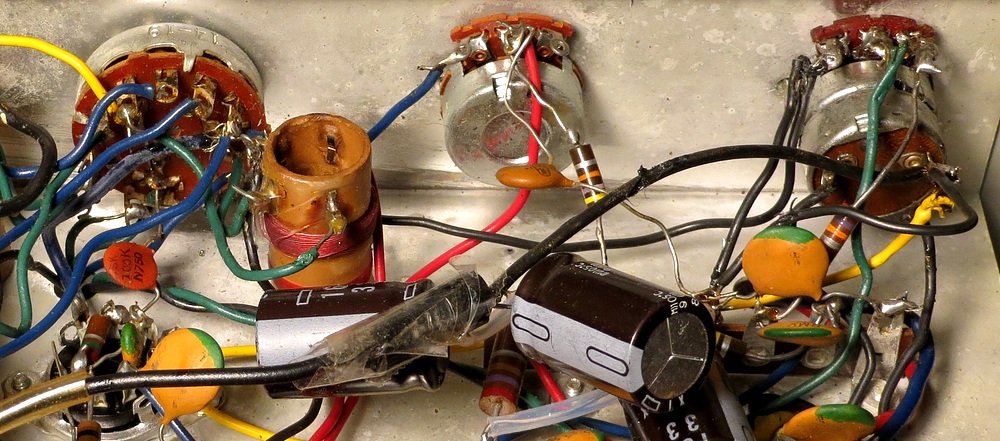
| The wiring was another
story. I have no idea how this radio was working. Several of
the connections didn't even have any solder on them. One of
the resistors BROKE when I touched it. |
|
| |
|
|
| |
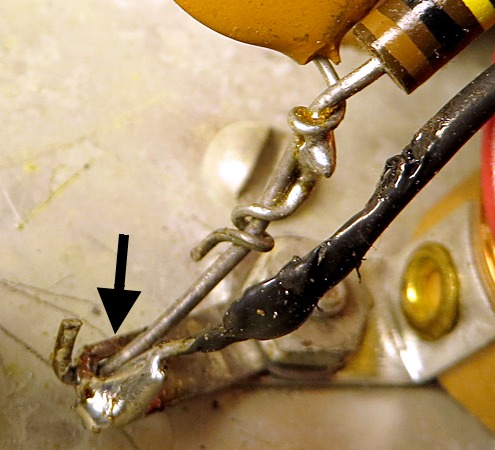
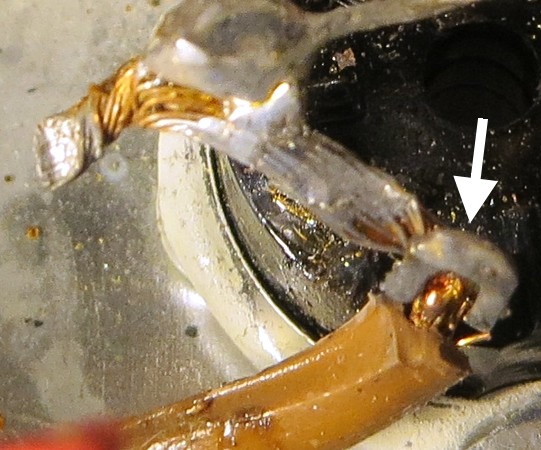
I don't want to be too
critical of the soldering job. It's not an easy kit to build
and it may have been somebody's first attempt at soldering.
It worked when I turned it on, so I can't complain. The best
thing for this radio was to take it apart, turn it back into
a kit and put it back together.
|
|
| |
| |
|
|
| |