|
|
|
|
|
|
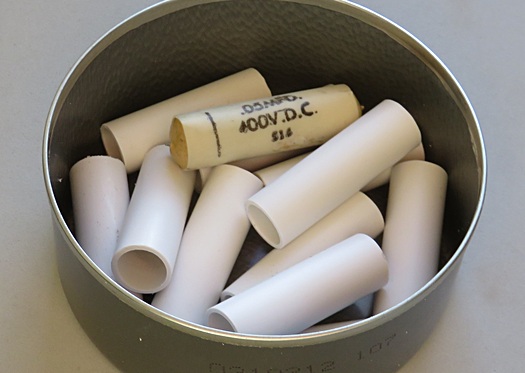
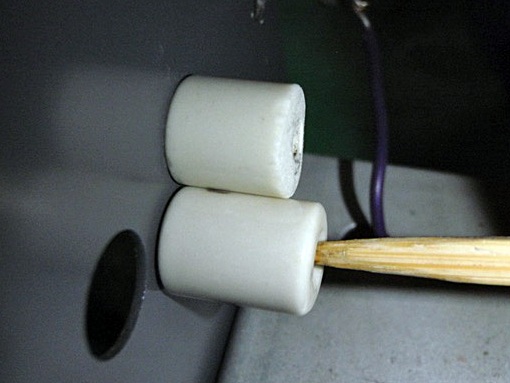
| The second attempt
involved obtaining the approximate diameter plastic tube,
sawing it into lengths in a miter box, sanding the edges,
and inserting the new capacitors. The ends were then
sealed with a yellow tinted hot glue. I had tried to cut the
tubes with a PEX cutter, but the plastic isn't PEX, it's
PVC. All it did was crush the end of the tube, so don't try
it. The tube was
listed on ebay as having 12mm outside diameter, which is
just about 1/2 inch. |
|
|
|
|
|
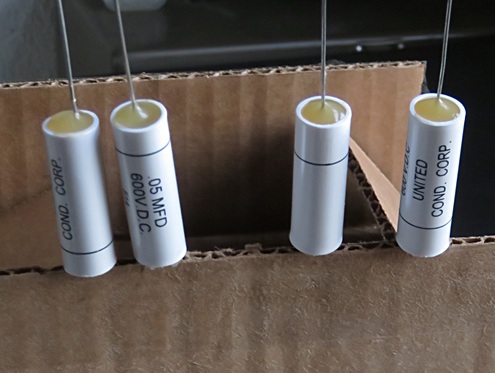
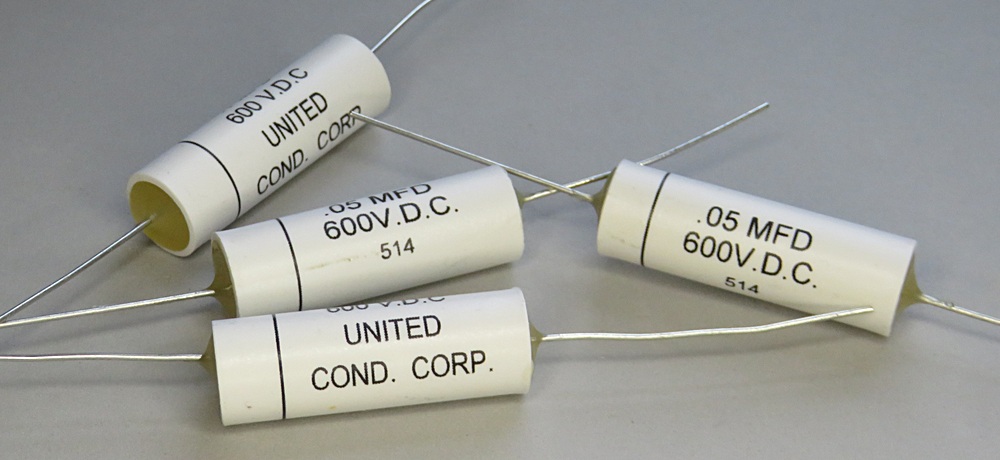
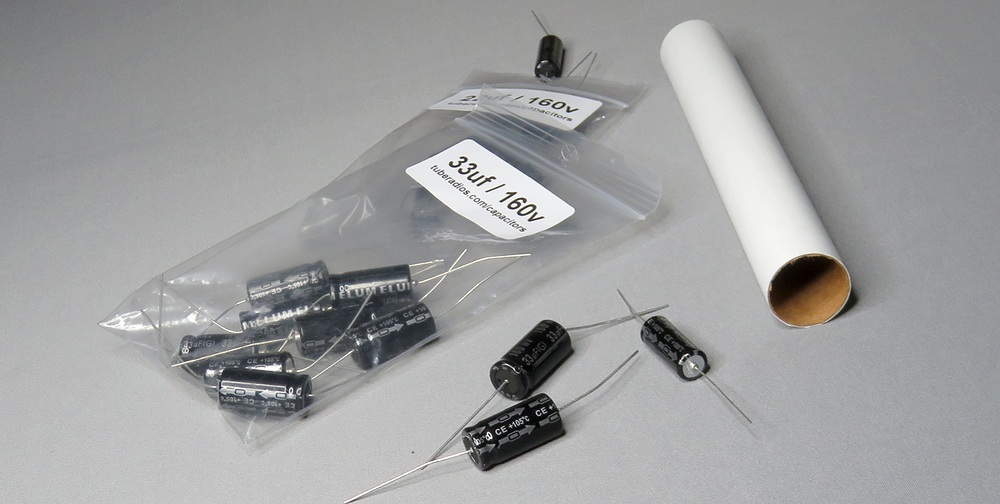
After the glue had
cooled, labels were made with waterslide decal paper and the
decals were applied. They turned out very nice. Good thing,
too. I was out of .05 capacitors. Also, none of this is as
easy as it sounds.
I can find no information whatsoever on United Condenser
Corp. There is no brand name on the .05 capacitors. |
|
|
|
|
|
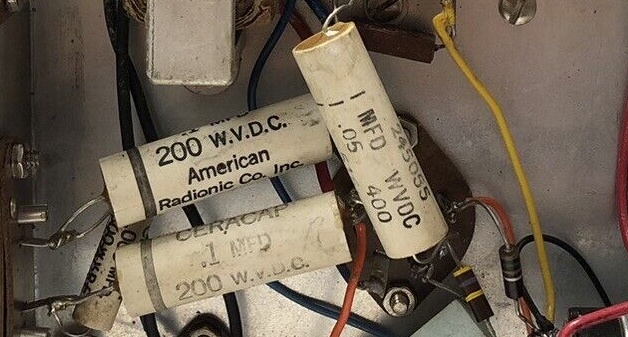
| Some Ocean Hopper
capacitors were made by American Radionic Co. Inc, which also
made the "Ceracap" brand found in many Knight
Space Spanners. This picture is from an Ocean Hopper listed
on ebay. These capacitors have ceramic tubes, but the
ones in my Ocean Hopper were cheap plastic. Now they're PVC,
so that's an improvement. |
|
|
|
|
|
Making a Filter Capacitor |
|
|
|
|
|
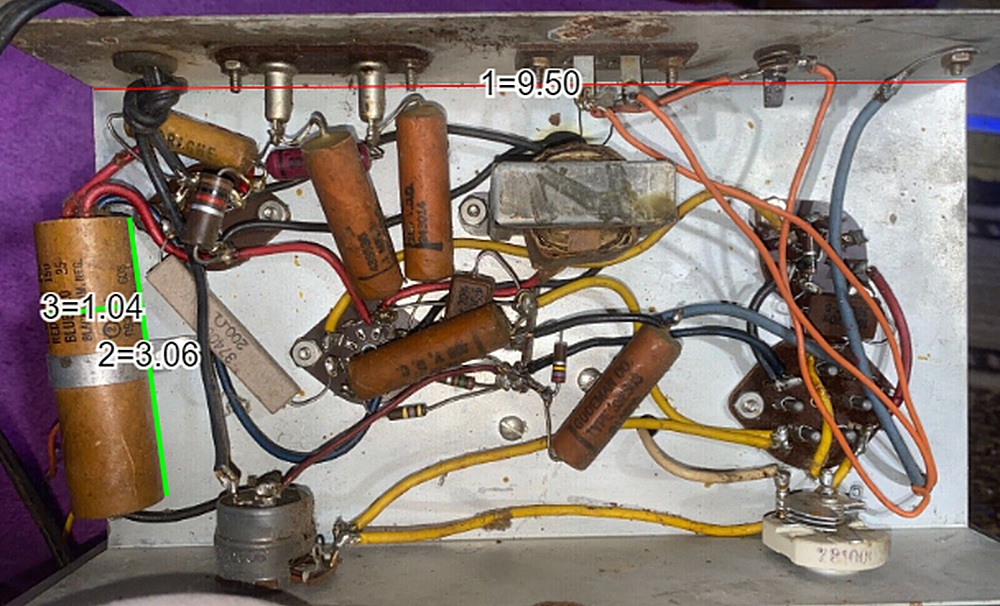
How big was the
original filter capacitor? There is a cool site on the
Internet where you can measure objects in a photo if you
know one of the dimensions. To get the size of the filter
capacitor I just used a photo of an Ocean Hopper chassis.
The line at the top (red) was drawn and assigned the length of 9.5
inches. A second line (green) was drawn down the length of the
capacitor and was automatically determined to be 3
inches. The short green line shows it's an inch across.
Here's a link to the site.
Ocean Hopper fans will spot some modifications to this
chassis. The orange wires going through the hole on the
lower right are attached to a speaker the owner built into
the cabinet. |
|
|
|
|
|
| The tube used was from an Estes model rocket kit
and is size BT-50. It was cut to three inches in length and
three capacitors were inserted into it. The capacitor leads
had been shortened and insulated wires were soldered to
them. Cardboard disks were glued onto each end to hold
everything in place. |
|
|
|
|
|
|
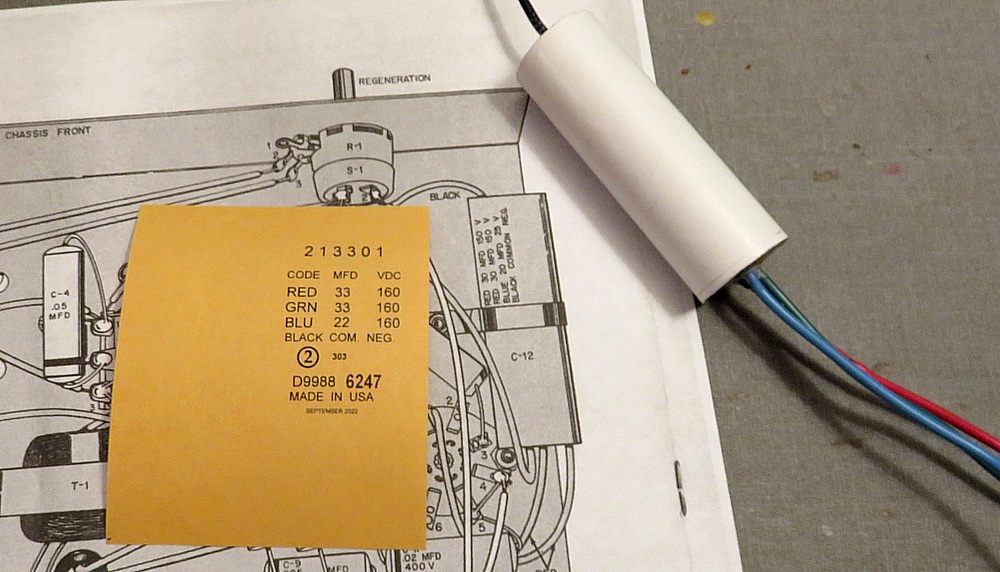
The label, based on an actual Ocean Hopper filter
capacitor, was created in a graphics program. It was printed on a
manila envelope. Notice there is no brand name on the capacitor. One
would be inclined to think that Allied used bottom of the barrel
components in these kits, but nah, that couldn't be, could it? |
|
|
|
|
|
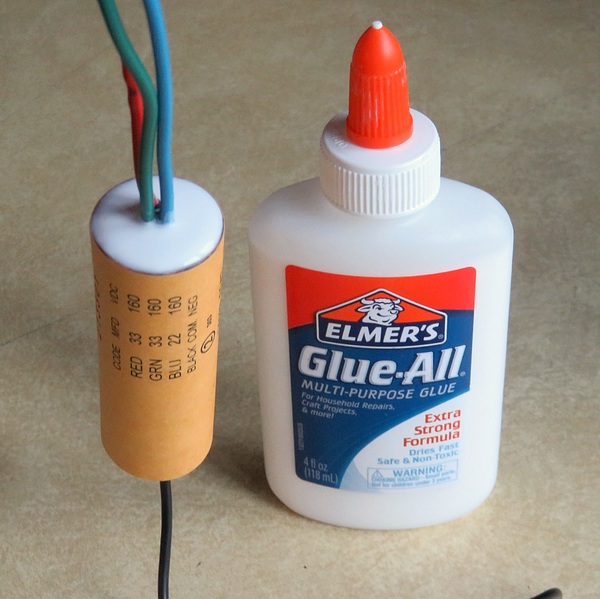
Each end had disks made from an empty box
of CheeZ-It crackers. I was going to use the red color, but
flipped them around so they were brown (or whatever you call
the color of recycled paper cracker boxes). Each end got
three puddles of Elmer's Glue-All, allowing each layer to
dry before the next was applied. It dried clear.
Cheez-Its don't taste the same as they used to. Years ago
they were good, but not so much now. I didn't taste the box,
but the box probably tastes like a Cheez-It with no salt. |
|
|
|
|
|
|
Success! It was given a coat of satin lacquer because
the original had a sheen to it. |
|
Das kapacitor ist nicht mit hum und buzzen. |
|
|
| |
|
|
|
|
|
| |
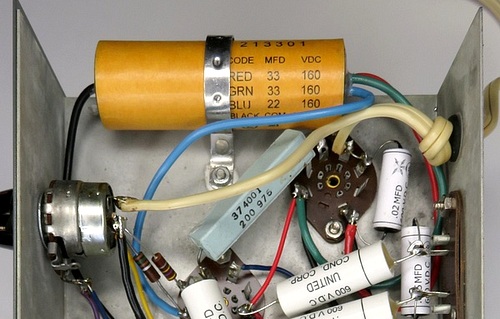
| Why is everything in this radio
crammed to one side? In the directions, it shows
the filter capacitor ON TOP of the tube socket. The
rectangular 200Ω
resistor gets hot enough to burn you if you touch
it, so why is the filter capacitor allowed to touch
it? When the chassis is in the cabinet, there is NO
air circulation under it. The filter capacitor won't
last long while being baked to death by the
resistor. |
|
|
|
| |
The Cabinet |
|
|
|
|
|
|
|
|
|
|
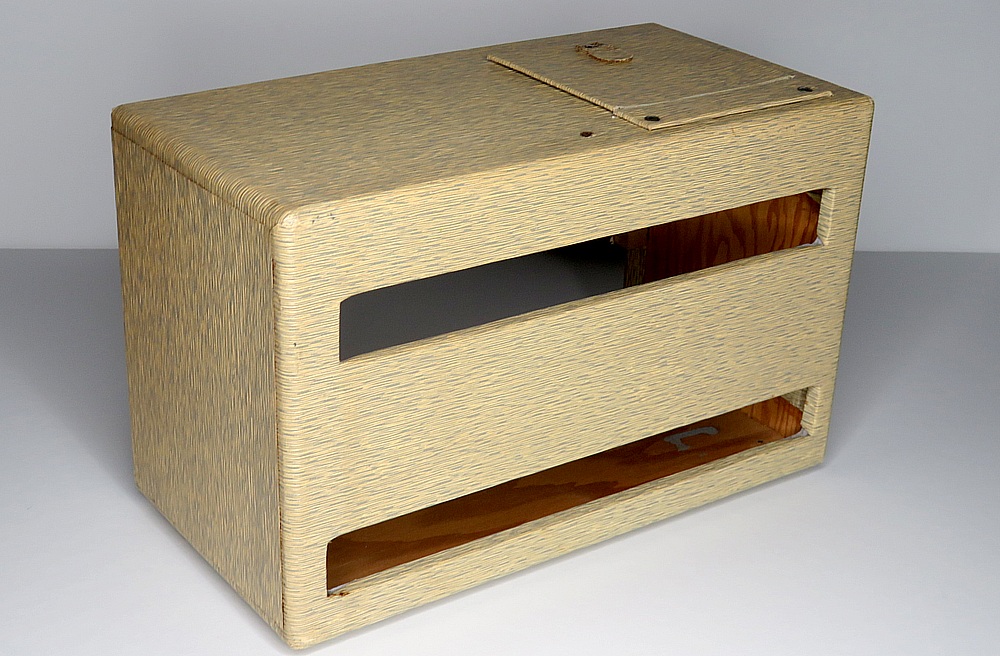
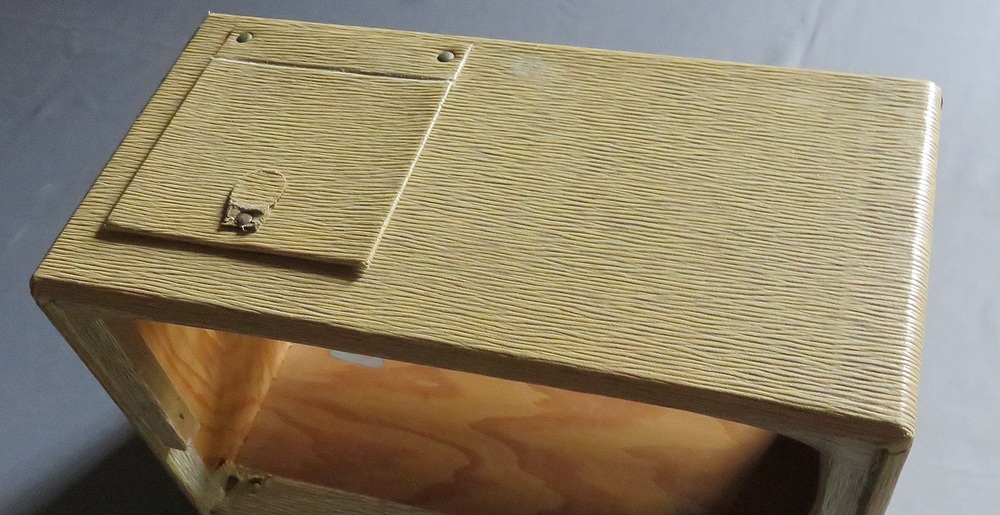
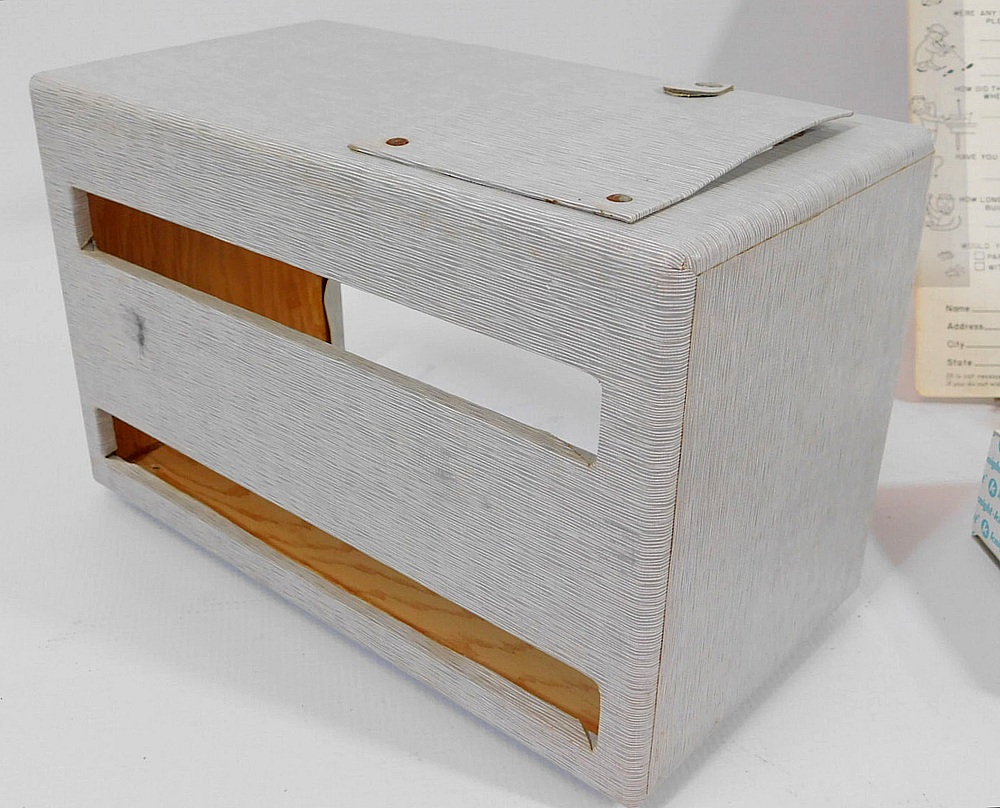
The cabinet from the back. It was in fairly nice
shape, except for a hole drilled in the top. The hole was
about the size of a BB.
The Allied catalogs state that the cabinet is (was)
gray, and it is covered with pyroxylin. Pyroxylin is a form of
nitrocellulose used to make artificial leather and other products.
This accounts for the current tan color, as
nitrocellulose degrades and yellows over time. |
|
|
|
|
|
|
|
|
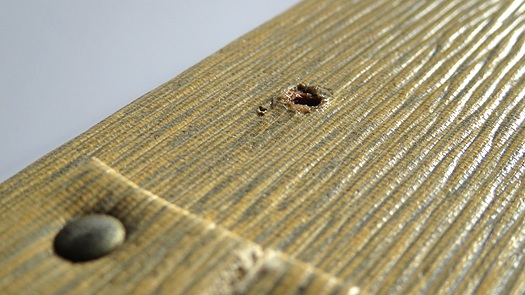
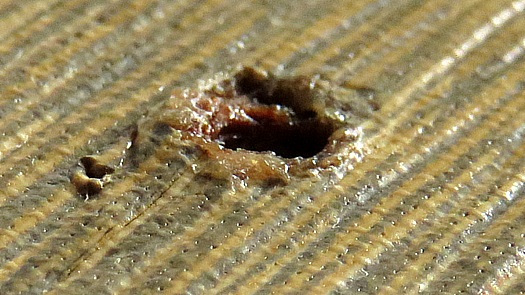
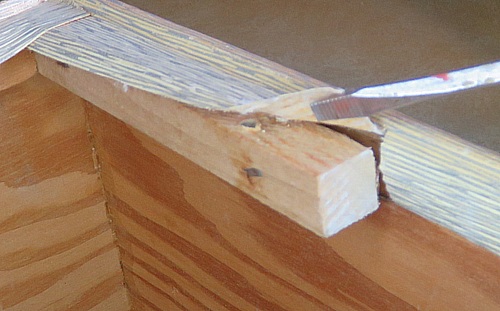
| The hole
didn't go all the way through and seemed to be an
accident. It had been coated with glue, probably to
keep the covering from fraying. Up close it looked
like a meteor crater. I resisted the urge to tap the
edges down with a ball peen hammer. It may have been
that way for half a century and I didn't want to
make it worse. |
|
|
|
|
|
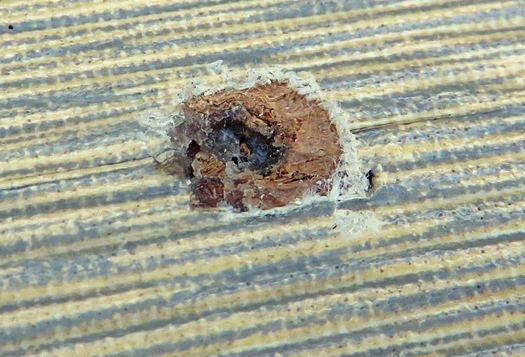
| The high
points were carved off with a utility knife, then
the hole was filled with a little dab of Bondo.
After the Bondo had set, a pattern was sanded into
it to match the pattern on the covering. The photo
on the right was taken by shining a flashlight
across the cabinet to bring out the texture. |
|
|
|
|
|
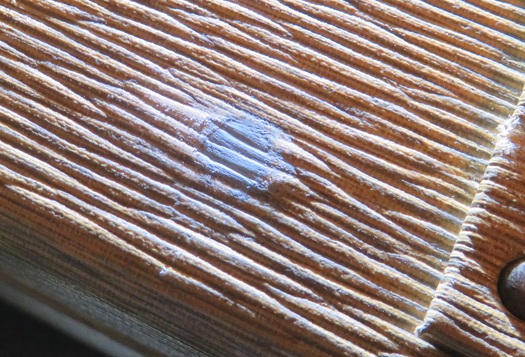
| The spot
was painted with acrylic craft paint after matching
the base color. It looked great till I started to
paint on the gray-blue fabric pattern, at which I
wasn't that successful. I don't understand it; I
watched a guy restore a 500 year old painting on
YouTube at lunch time, and I did not become a master
art restorer. Anyway, I had to stop messing with it
before I ruined it. |
|
|
|
|
|
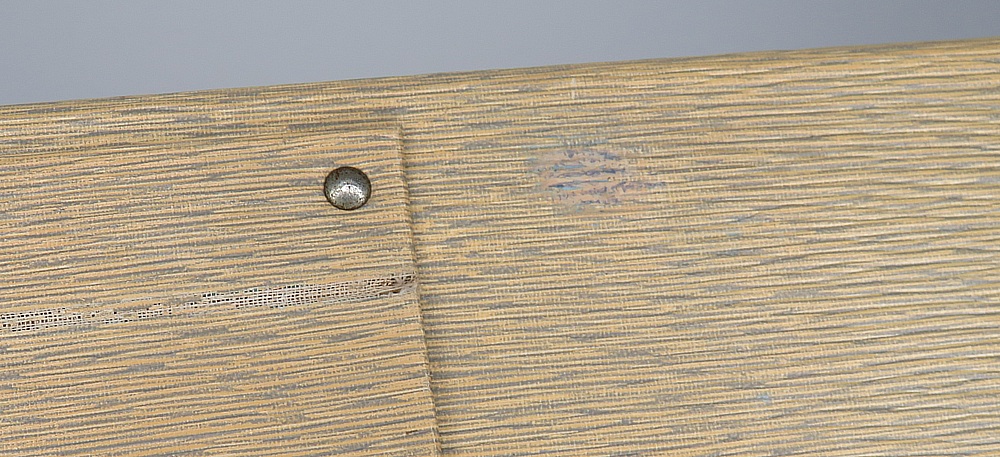
You can
plainly see there is some kind of mark on top of the
cabinet, but nobody would ever suspect it had once
been a hole. I was, however, disappointed with the
result.
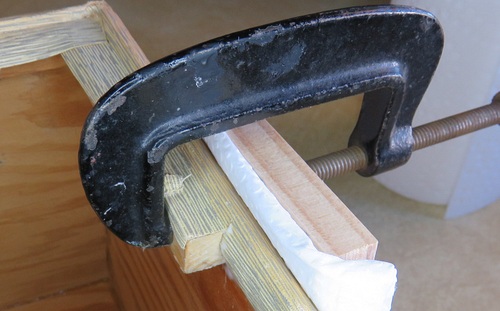
When the "repair" was done, the sheen on the cabinet
didn't match up with the paint if the light struck
it a certain way. I cut a small hole in a paper
plate, held it over the spot, and gave it a shot of
gloss clear coat. When it was dry, I very gently
went over it with a Scotch-Brite type of sanding pad
till the shine matched the rest of the cabinet top. |
|
|
|
|
|
|
|
|
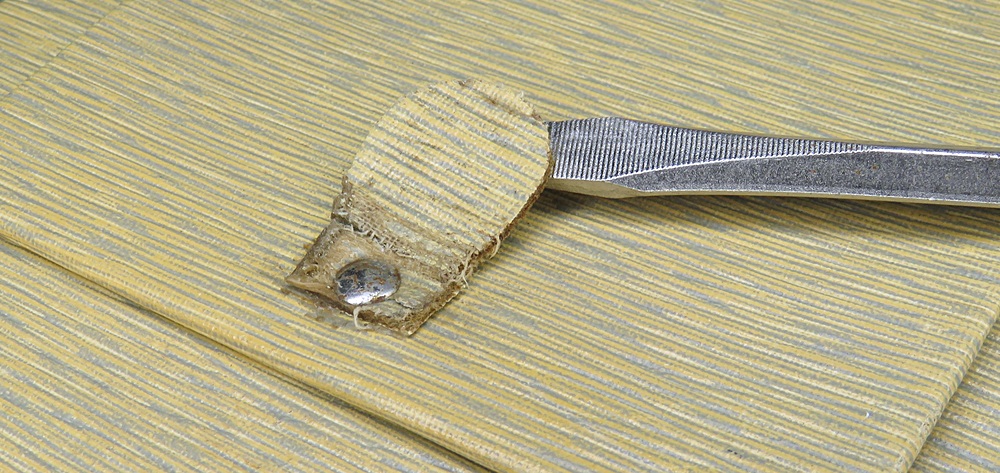
This was
another problem. The tab on the door you open to
change the coils was so worn, I was convinced that if
I used it once more I'd pull it right off. I wanted
to remove it and reinforce it, but there is no way
to remove the rivet without damaging the door.
The "fix" was to just glue it down with some white
glue. If someone wants to mess with it in the
future, it will loosen up with a hair dryer. |
|
|
|
|
|
|
After fixing a few other odds and ends on the cabinet,
it was (almost) as good as new. |
|
|
|
|
|
|
This color of the cabinet should be similar to this. Photo is from
ebay, January 2023. |
|
|
|
|
COILS |
|
|
|
|
|
|
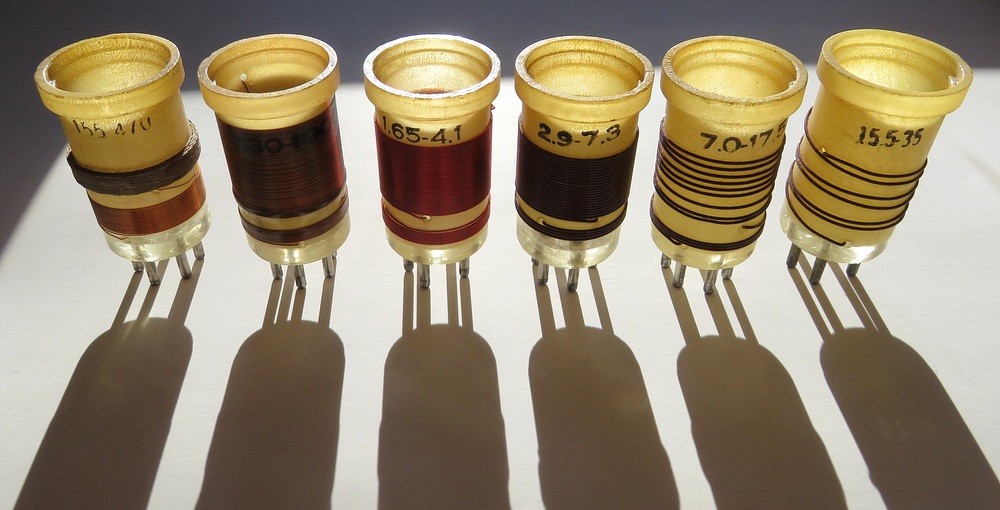
The coils were purchased from Mrs. Eppel, the
same person who sold the Ocean Hopper. |
|
Das ist ein artsy-fartsy Foto! |
|
|
|
|
|
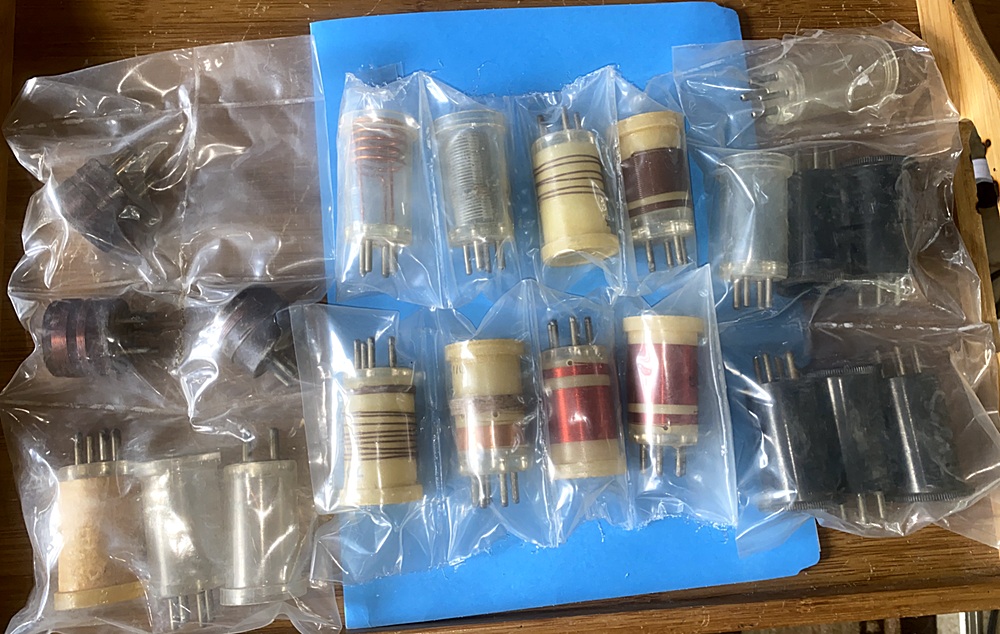
| Each coil was sealed in plastic,
and the bubble of air protected them. Unfortunately,
it must have been humid air, because the pins were
covered in a white fluffy powder caused by oxidation
of the plating. It was easily sanded off. The coils
were a great deal. Everything in this picture was
$38. Not all the coils are for an Ocean Hopper and
some are blank 5 pin coil forms, but later Mrs.
Eppel was selling individual coils for almost as
much as this whole set. In 1958, the coils were 65¢
each, or $6.70 in 2022 money. |
|
|
|
|
|
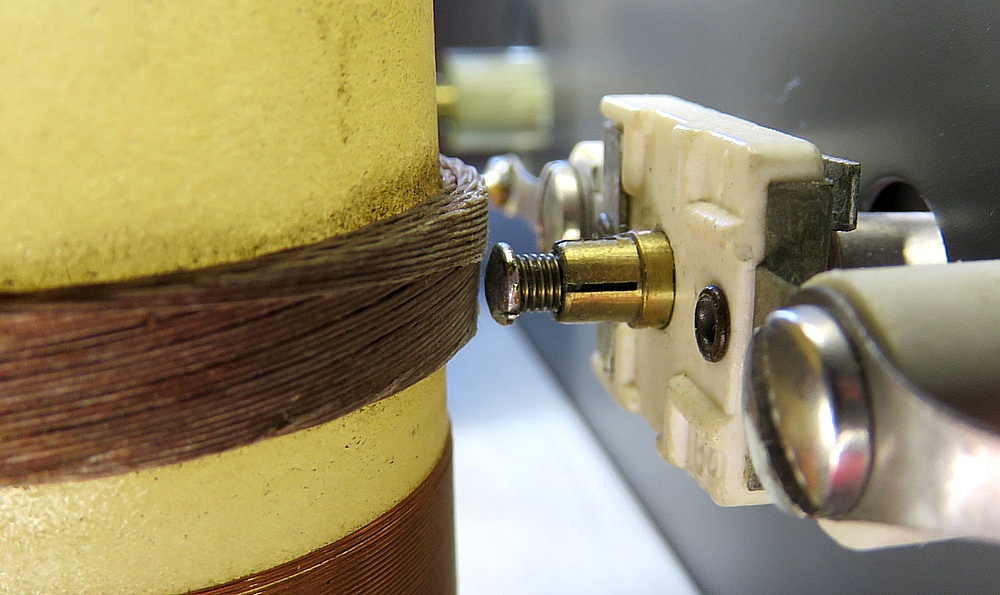
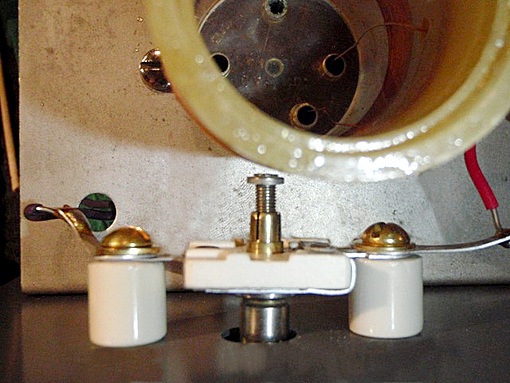
| The antenna tune capacitor can be
driven right into the low frequency coil, and there
is a warning about it in the manual. If Allied had
just moved the tube and coil sockets over 1/2 of an
inch this wouldn't be a problem, and that big, hot
resistor would not be in contact with the filter
capacitor. |
|
| |
|
|
| Jeffrey Hutchinson of Troutdale,
Oregon, came up with this fix. He reduced the size of
the ceramic standoffs by 20% with a grinding wheel.
In the photo on the right, the antenna tune
capacitor is completely closed, but the shaft can't
come into contact with the coil. |
|
| |
|
|
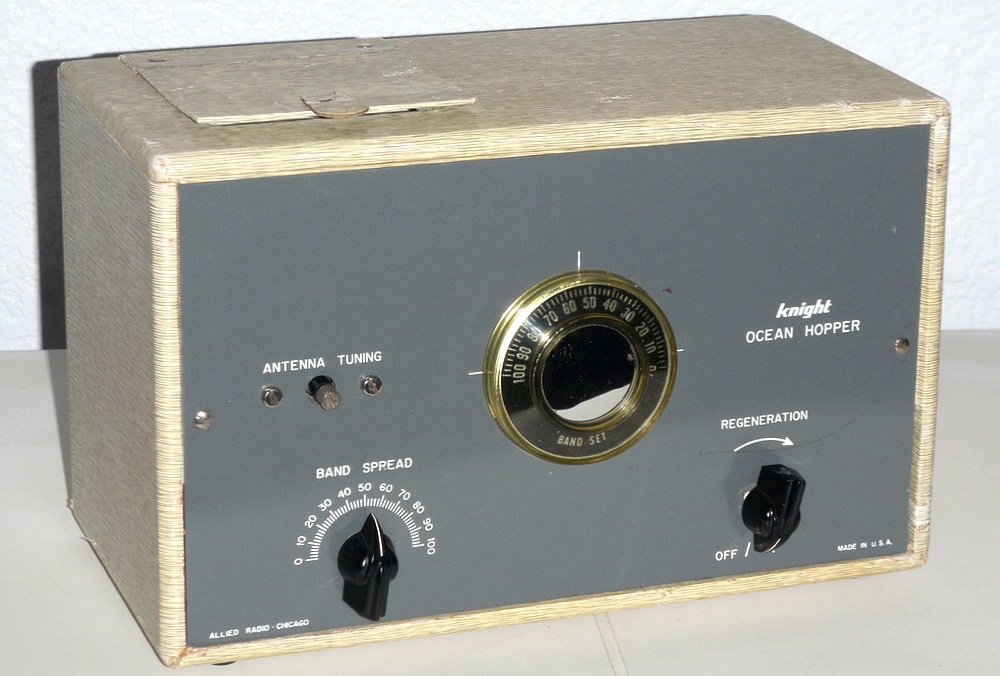
| Here is Jeff's restored Ocean
Hopper. The faceplate is the same one shown on the previous page,
but you can't see the ding in the side. |
| |
|
| |
|
|
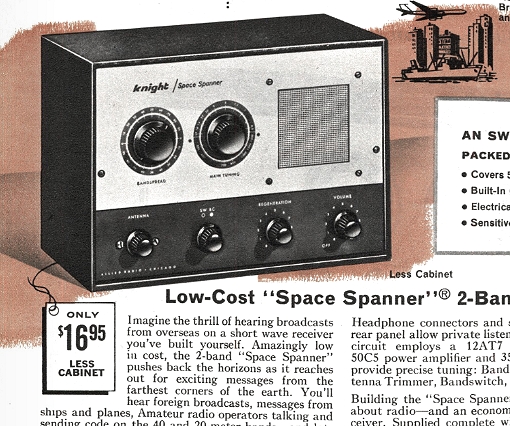
In 1962, you could buy a Space
Spanner (minus the cabinet) for the same price as an
Ocean Hopper. The Space Spanner only had two bands,
while the Ocean Hopper had far greater coverage with
its plug-in coils. However, the Space Spanner was a
superior receiver which employed a 12AT7 as a dual
triode detector/amplifier, and had a built in
speaker and volume control. People back then must
have been pulling their hair out deciding which one
to get. Also, you had to buy a
set of headphones for the Ocean Hopper, as well as a
set of coils. The complete set of coils was $2.95
To put things in perspective, in 2022 an Ocean
Hopper with headphones and coils would cost about
$216.00, and a Space Spanner with a cabinet would
cost $188.00. You had to buy the Ocean Hopper if you
wanted more than a single short wave band. There was
a lot to listen to back then. |
|
|
|
|
|
|
| This was the answer - a SPAN
MASTER! The Span Master outperforms both the Ocean
Hopper and the Space Spanner. It would have gone
down in history as the best regen radio kit ever
made, except for the knobs. The knobs have a cheap
look and feel to them, and the main tuning knob has
half the dial scale on the bottom, so you can't see
it when your hand is on it. Apparently, nobody at
Allied Radio ever noticed this. The 2025 price is
$274.00. |
|
|
|
|
| |
| How does an Ocean Hopper sound?
See the video below. |
| |
|
|
|
|
|
| |
|
|
| |